Showing posts with label Needlework-Crocheting. Show all posts

Thursday, December 3, 2020

Needlework - Crocheted Snowman Card or Gift Holder

Please join my list of Linky and Google friends when you visit my blog!
Thanks!
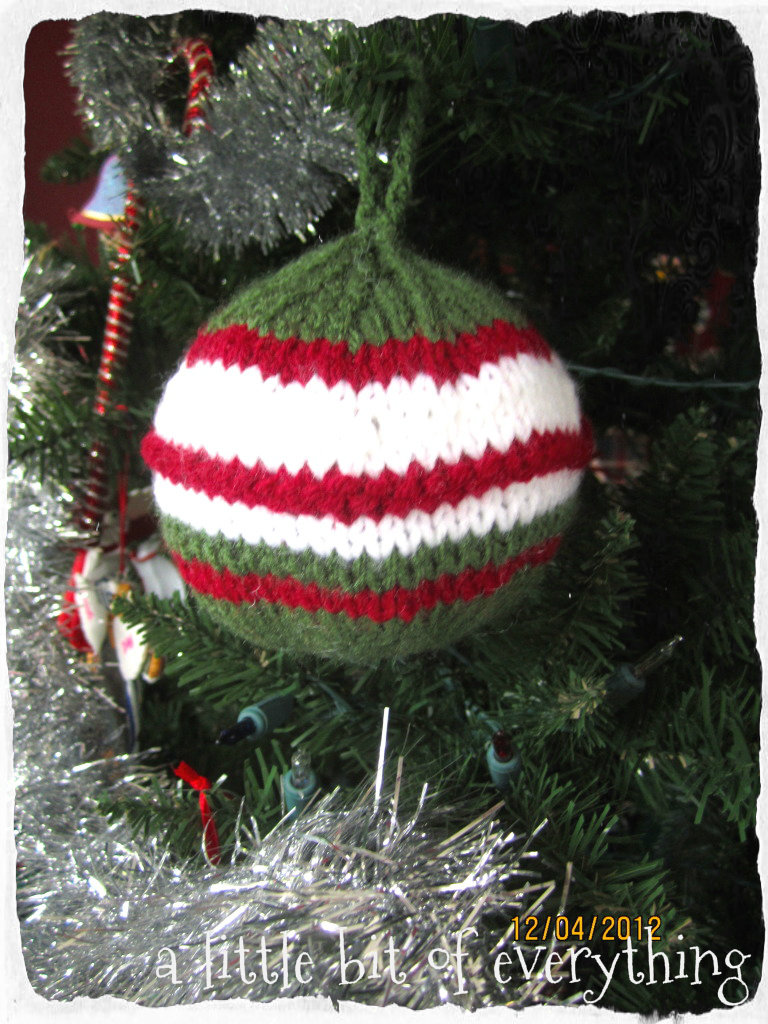
This Snowman pattern works up quickly and you can add a loop on the back to hang from a tree.  His hat lifts off on one side to reveal a card or gift inside.

Tuesday, October 27, 2020

Needlework: Little Ghost Finger Puppets

Please join my list of Linky and Google friends when you visit my blog!
Thanks!
These cute little ghosts work up quickly and, with the addition of a row of single crochet at the back of the neck, can be hung as a decoration.  

This free crochet pattern can be found at Lion Brand Yarn.  
BOO!!

Thursday, February 19, 2015

Needlebork: Shamrock Pins

Please join my list of Linky friends when you visit my blog! Thanks!
 I found this cute shamrock pin pattern here and instead of using glue to apply the pin, I sewed the pin to the shamrock.  The pins can be found at Michaels and A C Moore stores.  These could also be sewn to a snap barrette which you can locate at Dollar Tree Stores.
HAPPY ST. PATRICK'S DAY !

Materials and supplies:
Crochet hook size J
Small amount green worsted weight yarn
Pin back
Hot glue and hot glue gun


Pin:
Chain 3, join with a slip stitch in first chain to form a ring.
Petal (make 3): Chain 3, trc, dc, trc, ch 3, slip stitch in ring.
Stem: Chain 4, sc in 2nd chain from hook, and slipstitch in remaining two chains. Fasten off.
Weave in ends.
Lay right side down on heat proof surface. Hot glue pin back to petal opposite the stem.
I am linking to most of these BLOG PARTIES

Friday, February 1, 2013

Needlework: Valentine Basket

Please join my list of Linky and Google friends when you visit my blog!
Thanks!  
HAPPY VALENTINE'S DAY !!
This little basket is a perfect container for a Valentine's gift of Hershey Kisses.  I made these baskets as table favors for a Valentine's dinner.  

I adjusted the pattern after row 7 (36 sts.) by continuing to work in the round, but without increasing, for 5 addtional rows.  I then slipstitched twice around the top edge before adding the handle.  
              
               I am linking to most of these BLOG PARTIES

Wednesday, January 23, 2013

Needlework: USA Afghan

Please join my list of Linky and Google friends when you visit my blog!
Thanks!  
I loved the look of this USA Afghan when I found the free pattern on lionsbrand.com.  It calls for a size P crochet hook but I used size N.  I also made 30 panels instead of 9, crocheted them together per these instructions and then I added a double crochet border around the edge.  

I am linking to most of these BLOG PARTIES

Saturday, December 15, 2012

Needlework: Christmas Ornaments

Please join my list of Linky and Google friends when you visit my blog!
Thanks!  

This knitted Ornament can  be found at Lion Brand Yarn along with many other free patterns including this Santa....  
santa
...and other patterns available online are these Mittens and this Stocking,
stocking mittens
and this Snowflake.
snowflake
Merry Christmas!

I am linking to most of these BLOG PARTIES

Friday, October 12, 2012

Needlework: Pumpkin Hat

Please join my list of Linky and Google friends when you visit my blog! 
Thanks!
This crocheted hat is yet another version of the original helmet hat seen here and here and here representing various holidays.  I simply added a little stem and three leaves to mimic a pumpkin for a Halloween version of the same hat.  

I am linking to most of these BLOG PARTIES                                            

Sunday, September 16, 2012

Needlework: Crocheted Helmet Hat

Please join my list of Linky and Google friends when you visit my blog! Thanks!
This crocheted helmet hat can be made with or without ears.  It is adorable on and toasty to wear!
Click here for a Valentine version of this hat and here for a St. Patrick's Day version.
I am linking to most of these BLOG PARTIES

Monday, May 14, 2012

Needlework: Pink Doll Sweater & Hat

Please join my list of Linky friends and google friends when you visit my blog!  Thanks!
 

This cute cardigan and hat is a combination of patterns.  The sweater with a hood, Happy Day Hooded Cardigan, can be found in Knits for Girls and Dolls on amazon.com.  I simply did K1P1 ribbing instead of adding the hood on this particular sweater.  
The helmet hat  is a smaller version of a baby hat which can be found here.
Both are a perfect fit for both American Girl dolls and Cabbage Patch dolls, as shown. 

I am linking to most of these BLOG PARTIES

Sunday, April 22, 2012

Needlework: Crocheted Cups and Saucers

Please join my list of Linky friends when you visit my blog! Thanks!
These cute tea cups and saucers are a perfect addition to any tea party.  They are offered free from Lion Brand Martha Stewart Crafts and although they recommend using cotton hemp, I simply 
used 4 ply acrylic yarn.  There is also a pattern for small cake plates.

I am linking to most of these BLOG PARTIES

Sunday, February 19, 2012

Needlework: Crocheted Shamrock Hat

Please join my list of Linky friends when you visit my blog! Thanks!
I found this adorable Bear Hat pattern and decided to add a Shamrock pin  to it for the holiday.  The pins are, of course, detachable.  I did run into the hat pattern being a bit small for an 18 month old so continued to increase stitches up to 50 but could have added even more.  I also crocheted additional rows.  
I am linking to most of these BLOG PARTIES

Tuesday, January 31, 2012

Needlework: Valentine Bear Hat

I found this adorable Bear Hat pattern and decided to add Valentine pins to it for the holiday.  The heart pins in two sizes can be found here and are, of course, detachable.  I did run into the pattern being a bit small for an 18 month old so continued to increase stitches up to 50 but could have added even more.  I also crocheted additional rows.  
In the photo above I added the larger crocheted hearts on the ear flaps which can also be removed after the holiday.
HAPPY VALENTINE'S DAY !
I am linking to most of these BLOG PARTIES

Wednesday, January 25, 2012

Needlework: Valentine Heart Barrettes & Pins

I found this cute little Valentine Heart pattern here and the snap clips are from the Dollar Tree.   I simply sewed the valentine heart to the clip.  This is the smaller of the hearts in the directions.  Below are the larger hearts to which I attached a pin.  I used a G crochet hook and added a row of single crochet in white in the top photo.
HAPPY VALENTINE'S DAY!


Materials:
Small amount of worsted weight yarn
G (4.5mm) or H (5.0mm) crochet hook
3/4 inch pin back
Needle and thread to match or hot glue


Small Heart Motif

Chain 4, make all stitches in the first chain. 3 trc, 3 dc, chain 1, 1 trc, chain 1, 3 dc, 3 trc, chain 2 slip stitch. Fasten off.


Sew or glue pin back to back of heart. Embellish with ribbon or yarn bow.

Large Heart Motif

Round 1: Chain 4, make all stitches in the first chain. 3 trc, 3 dc, chain 1, 1 trc, chain 1, 3 dc, 3 trc, chain 2 slip stitch.

Round 2. Chain 3, in first trc make sc and hdc, in next stitch 3 hdc, in next stitch 2 hdc, 1 sc in next four stitches, chain1 dc in trc chain 1, sc in next four stitches, 2 hdc in next stitch, 3 hdc in next stitch, hdc and sc in next stitch, chain 3 and slip stitch in joining. Fasten off.

Sew or glue pin back to back of heart. Embellish with ribbon or yarn bow.
I am linking to most of these BLOG PARTIES

Wednesday, December 7, 2011

Needlework: Knitted Baby Dress

Here is a cute little dress I knitted for my granddaughter.  It is made with the same yarn as a sweater set I knitted for her earlier,  seen below.  The pattern can be found in "Lovable Hand Knits, Infants to 4 Years" on amazon.com. It is called "Striped Poor Boy Dress, No. 3012 - I eliminated the stripes and added rosettes from Lion Brand Yarn, "Crocheted Rosettes/Flowers"
I made up the bag in the same pattern, k2,p2, as the dress.  
The matching hat is crocheted and from Lion Brand free patterns online, Floppy Brim Hat.  I added another rosette and took it in a bit on the top for the time being.   
This set is similar to patterns which can be found here on this blog.
I am linking to most of these BLOG PARTIES

Monday, November 21, 2011

Needlework: Flower Afghan

I made a couple of these afghans years ago and love the finished product.  I came across the pattern recently in  Red Heart's  Afghans & Crochet Classics available on Amazon.com.  It is called "Grand Gardenias" and can be found on page 72.  The finished size is 47"x62" and each square measures
 7 1/2".  Because it is worked in squares, it is a nice project to take along when you are out and about.  
After locating this afghan tucked away in the linen closet, I offered it to my daughter as this is the accent color in her family room.  And she snapped it up. I was happy to see it get a second life in my daughter's home!
I am linking to most of these BLOG PARTIES

Thursday, October 13, 2011

Needlework: Stuffed Elephant & Duck Toys

I adapted these Elephant directions to make a Duck when my oldest daughter was born. Working in rounds, I fashioned "wings" to attach to the sides after stitching the front and backs together. I also added a "head" made in the same manner as the "body". Then I fashioned the "bill" and stitched it on for a mouth. I make this up as I went along so have no written directions for these changes. These directions are in the pattern's original colors and were taken from the December 1974 issue of Woman's Day Magazine.

BODY: Front Section: Starting at front with red, ch 2. 1st rnd: Work 6 sc in 2nd ch from hook. So not join, but mark beg of each rnd. 2nd rnd (inc rnd): work 2 sc in each sc around (12sc). 3rd rnd (inc rnd): Sc in each sc, increasing 6 sc evenly spaced around (18sc). 4th through 8th rnd: Repeat 3rd rnd (48sc). 9th rnd: Sc in each sc around.
Continue to work even until piece reaches desired size. Break off.
Back Section: Work as for front section until piece is approximately the same size as the front section leaving about 15" length of yarn to sew sections together.
EARS: (make 2) Starting at narrow end with yellow, ch 6. 1st row: Sc in 2nd ch from hook and in each ch across; ch 1, turn. 2nd row (inc row): work 2 sc in first sc, sc in each sc to within last sc, 2 in last sc (7sc); ch1, turn.
Repeat 2nd row twice more (11sc), then work even until piece measures about 1 1/2" from beg. Mark first and last st. of last row. Break off.
Border: 1st round: Starting in right marked st with red, work 3 sc in this st (corner made), sc in each st across to within left marked st, work another corner; continue to sc evenly around remainder of ear. 2nd and 3rd rnds: Sc in each sc around, working corner in center sc at each corner. Breakoff.
TRUNK: Starting at end with yellow, ch 2. 1st rnd: Work 4 sc in 2nd ch from hook. Attach red; break off yellow. 2nd rnd (inc rnd): With red, work 2 sc in each sc around (8sc). Sc in each sc around until piece measures about 2 1/2" long. Last rnd (inc rnd): Sc in each sc, increasing 4 sc evenly spaced around. Break off.
FINISHING: Sew ears to front section of body and stitch eyes with yarn. Attach trunk below eyes after stuffing with polyfill. Stitch or crochet front and back sections together leaving room to stuff with polyfill, then stitch closed.


And here is our oldest with her trusted duckies by her side....a little worse for wear and many years ago. These duckies are still with us today, tucked away in a memory chest....
I am linking to most of these BLOG PARTIES

Sunday, February 20, 2011

Needlework: Crocheted Afghan

This afghan measures 48" x 54" when completed and uses 4 ply worsted weight yarn and size G crochet hook. It is worked in six strips and then these are stitched together along the long edges. It is a good project for taking along with you since the strips are not cumbersome to transport. The pattern, "Park Avenue", can be found in "Red Heart Afghans and Crochet Classics" on amazon.com and is considered "easy" and supposedly their "most requested pattern of all time".
I am linking to most of these BLOG PARTIES

Saturday, November 6, 2010

Needlework: Crocheted Teddy Bears

 This pattern is provided on the Lion Brand Yarn website along with many other free patterns which range from "easy" to "advanced".  The site is an excellent source of a vast variety of knit and crochet projects.
I am linking to most of these BLOG PARTIES
GAUGE: 11 sc = 4 in. (10 cm) BE SURE TO CHECK YOUR GAUGE. When you match the gauge in a pattern, your project will be the size specified in the pattern and the materials specified in the pattern will be sufficient. If it takes you fewer stitches and rows to make a 4 in. [10 cm] square, try using a smaller size hook or needles; if more stitches and rows, try a larger size hook or needles.
STITCH EXPLANATION: Sc2tog (decrease) (Insert hook into next st and draw up a loop) twice.  Yarn over and draw through all 3 loops on hook.


NOTES:Rnds are worked in continuous spirals; do not join and do not turn. Place marker to indicate beg of rnd.
HEAD
With A, ch 2.
Rnd 1: Work 6 sc in first ch. Place marker in first stitch for beginning of rnd, move marker up each rnd.
Rnd 2: Work 2 sc in each st around –12 sc.
Rnd 3: *Work 2 sc in next st, sc in next st, rep from *around –18 sc.
Rnd 4: *2 sc in next st, sc in each of next 2 sts, rep from * around –24 sc.
Rnd 5: *2 sc in next st, sc in each of next 3 sts, rep from * around – 30 sc.
Rnd 6: *2 sc in next st, sc in each of next 4 sts, rep from * around – 36 sc.
Rnds 7-14: Sc in each st around – 36 sc.
Rnd 15: *Sc2tog, sc in each of next 4 sts, rep from * around – 30 sc.
Rnd 16: *Sc2tog, sc in each of next 3 sts, rep from * around – 24 sc.
Rnd 17: *Sc2tog, sc in each of next 2 sts, rep from * around – 18 sc.
Fasten off.
NOSE
With A, ch 2.
Rnds 1-3: Rep Rnds 1-3 of Head–18 sc.
Rnds 4 and 5: Sc in each st around.
Fasten off.
BODY
With A, ch 2.
Rnds 1-6: Rep Rnds 1-6 of Head–36 sc.
Rnd 7: *2 sc in st, sc in each of next 5 sts, rep from * around–42 sc.
Rnds 8 -17: Sc in each st around.
Rnd 18: Sc2tog, sc in each of next 17 sts, (sc2tog) twice, sc in each of next 17 sts, sc2tog–38 sc.
Rnd 19: Sc2tog, sc in each of next 15 sts, (sc2tog) twice, sc in each of next 15 sts, sc2tog–34 sc.
Rnd 20: Sc2tog, sc in each of next 13 sts, (sc2tog) twice, sc in each of next 13 sts, sc2tog–30 sc.
Rnd 21: Sc2tog, sc in each of next 11 sts, (sc2tog) twice, sc in each of next 11 sts, sc2tog–26 sc.
Rnd 22: Sc2tog, sc in each of next 9 sts, (sc2tog) twice, sc in each of next 9 sts, sc2tog–22 sc.
Rnd 23: Sc2tog, sc in each of next 7 sts, (sc2tog) twice, sc in each of next 7 sts, sc2tog–18 sc.
Fasten off.
ARMS (make 2)
With A, ch 2.
Rnds 1-3: Rep Rnds 1-3 of Head–18 sc.
Rnd 4: Sc in each st around–18 sc.
Rnd 5: Sc in each of next 8 sts, 2 sc in each of next 2 sts, sc in each of next 8 sts–20 sc.
Rnd 6: Sc in each of next 8 sts, (sc2tog) twice, sc in each of next 8 sts–18 sc.
Rnd 7: Sc in each of next 7 sts, (sc2tog) twice, sc in each of next 7 sts–16 sc.
Rnd 8: Sc in each of next 6 sts, (sc2tog) twice, sc in each of next 6 sts–14 sc.
Rnds 9-15: Sc in each st around.
Fasten off.
LEGS (make 2)
With A, ch 2.
Rnds 1-3: Rep Rnds 1-3 of Head.
Rnd 4: *2 sc in next st, sc in each of next 2 sts, rep from * around –24 sc.
Rnds 5-7: Sc in each st around.
Rnd 8: Sc in each of next 10 sts, (sc2tog) twice, sc in each of next 10 sts–22 sc.
Rnd 9: Sc in each of next 9 sts, (sc2tog) twice, sc in each of next 9 sts–20 sc.
Rnd 10: Sc in each of next 8 sts, (sc2tog) twice, sc in each of next 8 sts–18 sc.
Rnds 11-18: Sc in each st around.
Fasten off.
EARS (make 2)
With A, ch 2.
Rnds 1-3: Rep Rnds 1-3 of Head.
Rnds 4 and 5: Sc in each st around.
Rnd 6: *Sc2tog, sc in next st, rep from * around–12 sc.
Fasten off.
SCARF
With B, ch 71.
Row 1: Sc in 2nd ch from hook and each ch across–70 sc.
Row 2: Ch 1, turn, sc in each st across.
Fasten off.
POMPOM optional (make 2)
With C, ch 2.
Rnd 1: Work 6 sc in first ch. Place marker in first stitch for beginning of rnd, move marker up each rnd.
Rnd 2: *2 sc in next st, sc in next st, rep from * around in the next stitch* rep from around–9 sc.
Rnds 3 and 4: Sc in each st around.
Rnd 5: *Sc2tog, sc in next stitch* rep from around–6 sc.
Fasten off, leaving a long tail. Stuff Pompom and use tail to stitch closed.
FINISHING
Following package directions, attach Safety eyes onto Head. Lightly stuff Head. With black yarn and following photograph, embroider nose detail onto Nose. Lightly stuff Nose and sew to Head. Sew on Ears. Stuff Body, sew Head onto Body. Stuff Arms and Legs and sew to Body. Sew Pompoms to ends of Scarf, tie Scarf onto Bear. Weave in ends.

I am linking to most of these BLOG PARTIES

Friday, October 29, 2010

Needlework: Crocheted Dove

 
This dove works up quickly and can found along with other free patterns on the Lion Brand website.  Cute for hanging on the tree or on the top of a gift for the holidays.
Crochet hook G-6 
[sc2tog (sc decrease) Insert hook into st and draw up a loop.  Insert hook into nest st and draw up a loop.  Yarn over, draw through all 3 loops on hook.]
NOTES:Work in continuous rnds; do not join or turn unless otherwise instructed. Bird is worked with 2 strands of yarn held tog. [I used one strand] Wind each ball of A and B into 2 separate balls before beg.
HEAD AND BODY
Beg at top of head, with 2 strands of A held tog, ch 2.
Rnd 1: Work 6 sc in first ch. Place marker in first st for beg of rnd; move marker up as each rnd is completed.
Rnd 2: Work 2 sc in each sc around – 12 sts at the end of this rnd.
Rnd 3: *2 sc in next st, sc in next st, rep from * around – 18 sts.
Rnds 4-5: Sc in each st around.
Rnd 6: Sc in each of first 9 sts, *2 sc in next st, sc in each of next 2 sts, rep from * around – 21 sts.
Rnd 7: Sc in each of first 9 sts, *2 sc in next st, sc in each of next 3 sts, rep from * around – 24 sts.
Rnd 8: Sc in each of first 9 sts, *2 sc in next st, sc in each of next 4 sts, rep from * around – 27 sts.
Rnd 9: Sc in each of first 9 sts, *2 sc in next st, sc in each of next 5 sts, rep from * around – 30 sts.
Rnd 10: (Sc2tog, sc next st) 3 times, *2 sc in next st, sc in each of next 6 sts, rep from * around – 30 sts.
Rnd 11: (Sc2tog) 3 times, sc in each of next 11 sts, 2 sc in each of next 2 sts, sc to end - 29 sts.
Rnd 12: Sc in each of next 15 sts, 2 sc in each of next 2 sts, sc to end – 31 sts.
Rnd 13: Sc in each of next 16 sts, 2 sc in each of next 2 sts, sc to end – 33 sts.
Rnd 14: Sc2tog, sc in each of next 15 sts, 2 sc in each of next 2 sts, sc to end – 34 sts.
Rnd 15: Sc2tog, sc in each of next 15 sts, 2 sc in each of next 2 sts, sc to end – 35 sts. Begin to stuff piece, continue to stuff as work progresses.
Rnd 16: Sc2tog, sc in each of next 14 sts, sc2tog, sc to end – 33 sts.
Rnd 17: *Sc2tog, sc in next st; rep from * around – 22 sts.
Rnd 18: *Sc2tog; rep from * around – 11 sts. Fasten off.
WINGS (make 2)
With 2 strands of A held tog, ch 2.
Rnd 1: Work 8 sc in first ch.
Rnd 2: Sc in each of first 3 sts, hdc in each of next 2 sts, sc to end. Fasten off.
BEAK
With 2 strands of B held tog, ch 2.
Rnd 1: Work 4 sc in first ch.
Rnd 2: Sc in each st around. Fasten off.
FINISHING
Sew Wings to body, sew Beak to head. With 1 strand of B, embroider French knot eyes. Knot a length of A to top of Ornament for hanging loop. Weave in ends.


I am linking to most of these BLOG PARTIES

Monday, March 15, 2010

Needlework: Easter Bunny Cozy

Each adorable "cozy" would make a cute table decoration at each placesetting at Easter dinner. The "cozy" fits over a large plastic candy filled Easter egg. Rather than make pompoms, I purchased them from A.C. Moore along with the cellophane bags. I made French knot eyes and embroidered a pink nose on each bunny.  This is a free pattern from Lion Brand .  They offer many other free patterns on this site.
STITCH EXPLANATION: sc2tog (sc decrease) Insert hook into st and draw up a loop. Insert hook into next st and draw up a loop. Yarn over, draw through all 3 loops on hook.
NOTES:Work in continuous rnds; do not join or turn unless otherwise instructed.
COZY
With A, ch 2.
Rnd 1: Work 4 sc in first ch. Place marker in first st for beg of rnd; move marker up as each rnd is completed.
Rnd 2: Work 2 sc in each sc around - 8 sc.
Rnd 3: *2 sc in next st, sc in next st, rep from * around - 12 sc.
Rnd 4: *2 sc in next st, sc in each of next 2 sts, rep from * around - 16 sts.
Rnd 5: *2 sc in next st, sc in each of next 3 sts, rep from * around - 20 sts.
Rnd 6: *2 sc in next st, sc in each of next 4 sts, rep from * around - 24 sts.
Rnds 7 -14: Sc in each sc around.
Rnd 15: *Sc2tog, sc in each of next 2 sts, rep from * around. Fasten off.


EARS (make 2)
With A, ch 2.
Rnd 1: Work 4 sc in first ch. Place marker in first st for beg of rnd; move marker up as each rnd is completed.
Rnd 2: *2 sc in next st, sc in next st, rep from * around - 6 sc.
Rnd 3: *2 sc in next st, sc in each of next 2 sts, rep from * around - 8 sts.
Rnds 4-8: Sc in each st around. Fasten off.


FINISHING
Sew on beads to face. With B, embroider a straight st triangle for nose. Lightly stuff ears and sew to cozy. Following package directions, make a small pom-pom for tail. Sew tail to cozy. Weave in ends.


I am linking to
 Market Yourself Monday 
and Make it For Monday 
and  Made it Mondays 
and Metamorphosis Monday 
and It's So Very Creative Monday 
and Just Something I Whipped Up Monday 
and Do It Yourself Monday 
and Toot Your Horn Tuesday 
and Strut Your Stuff 
and Sew Cute Tuesday 
and Lucky Linky Tuesday 
Three or More Tuesday 
and Table Top Tuesday 
and Show And Tell Wednesday 
and Works for Me Wednesday 
and Thrifty Thursday 
and Transformation Thursday 
and with Frugalicious Friday 
and Easter Party 
and The Easter Roundup 
and Easter Party 


Related Posts with Thumbnails

Subscribe Now

click to learn how-don't be missing out !!

sitemeter